Security Groups in Manage Organization
The Security Groups tab in the Manage Organization section plays a vital role in safeguarding your organization's digital environment. This feature allows you to create and manage security groups, ensuring that device logins are restricted exclusively to trusted IP addresses. By implementing these controls, you can significantly enhance security and prevent unauthorized access.
Permission Management
Owners and Admins with Organization Settings permissions have full access to perform all actions within the organization.
Navigation
- Go to Manage Organization
- Select Security Groups
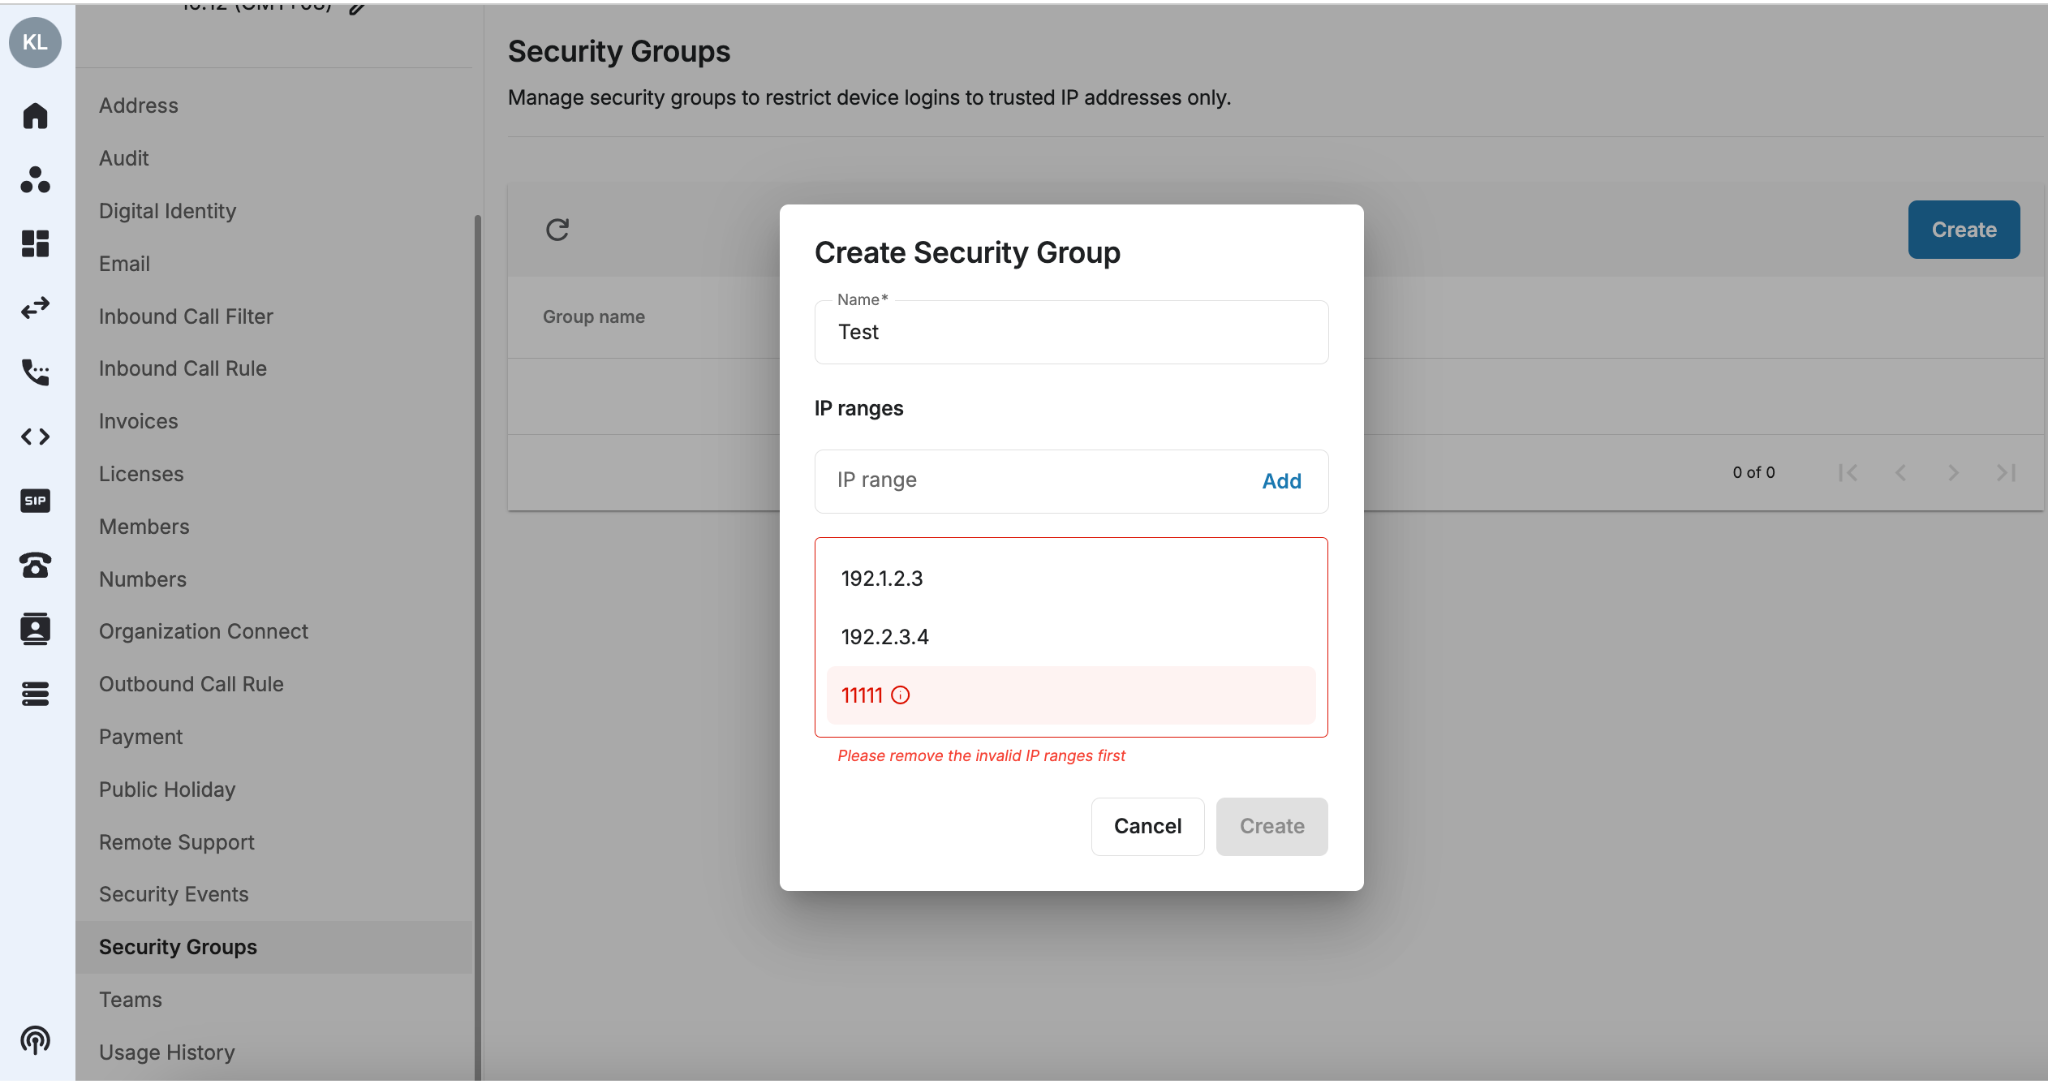
- Click on Create button
- Input Name
- Input IP range and/or IP address
- Click Add or Enter
- Click on Create
 * Input Limit: Maximum 50 entries can be added per group. Exceeding this limit will disable the input field.
- Input Validation: The system will notify users of incorrect format entries and prevent invalid entries from being added.
- Error: Please remove the invalid IP ranges first
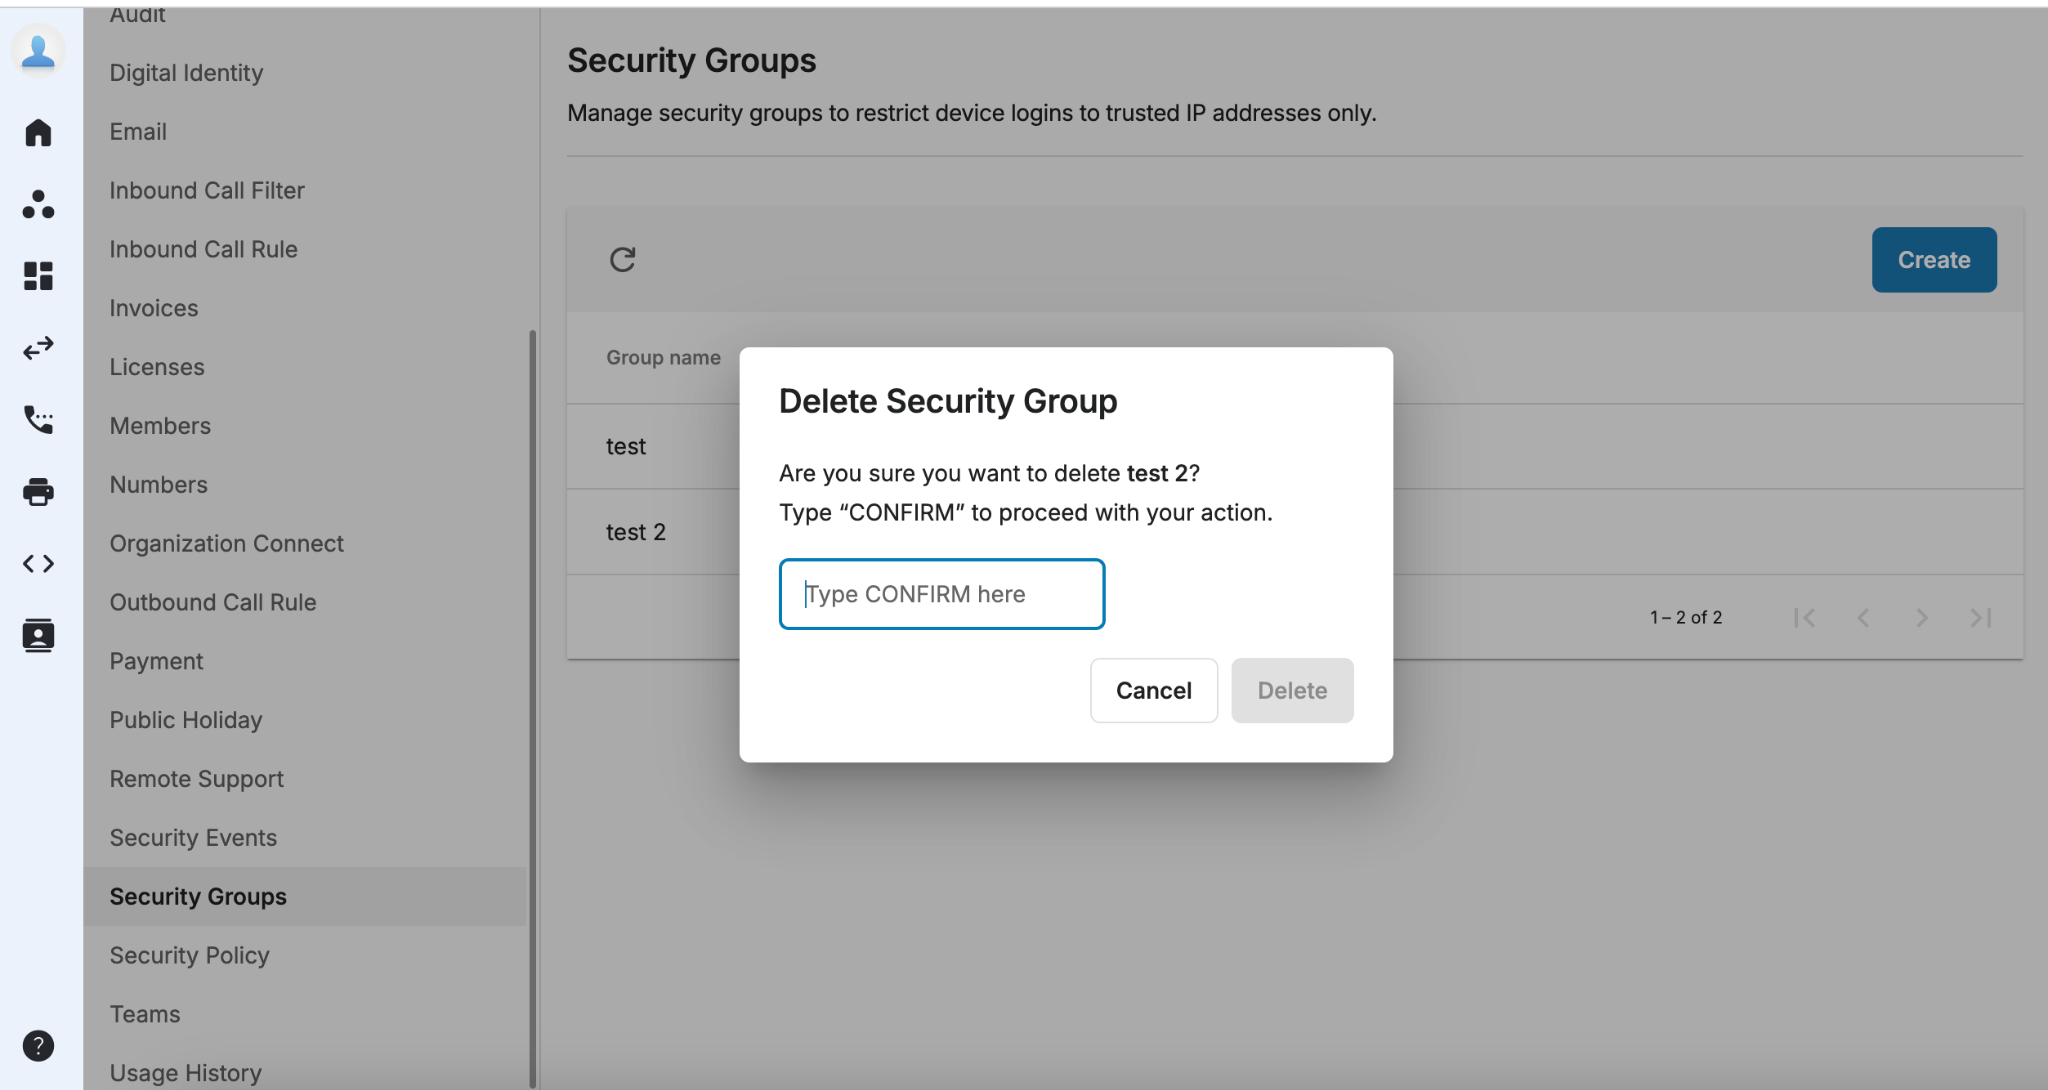
 * After a group is created, when users want to delete it, have to type “CONFIRM” to proceed.
Note
Ministry of Defence of Singapore - IP Phones can only be used within their designated locations.
- Single IP Address: If the user enters 192.168.1.25, the system will treat this as a single IP address entry.
- Subnet in CIDR Notation: If the user enters 192.168.1.0/24, the system will interpret this as a range of IP addresses from 192.168.1.0 to 192.168.1.255.
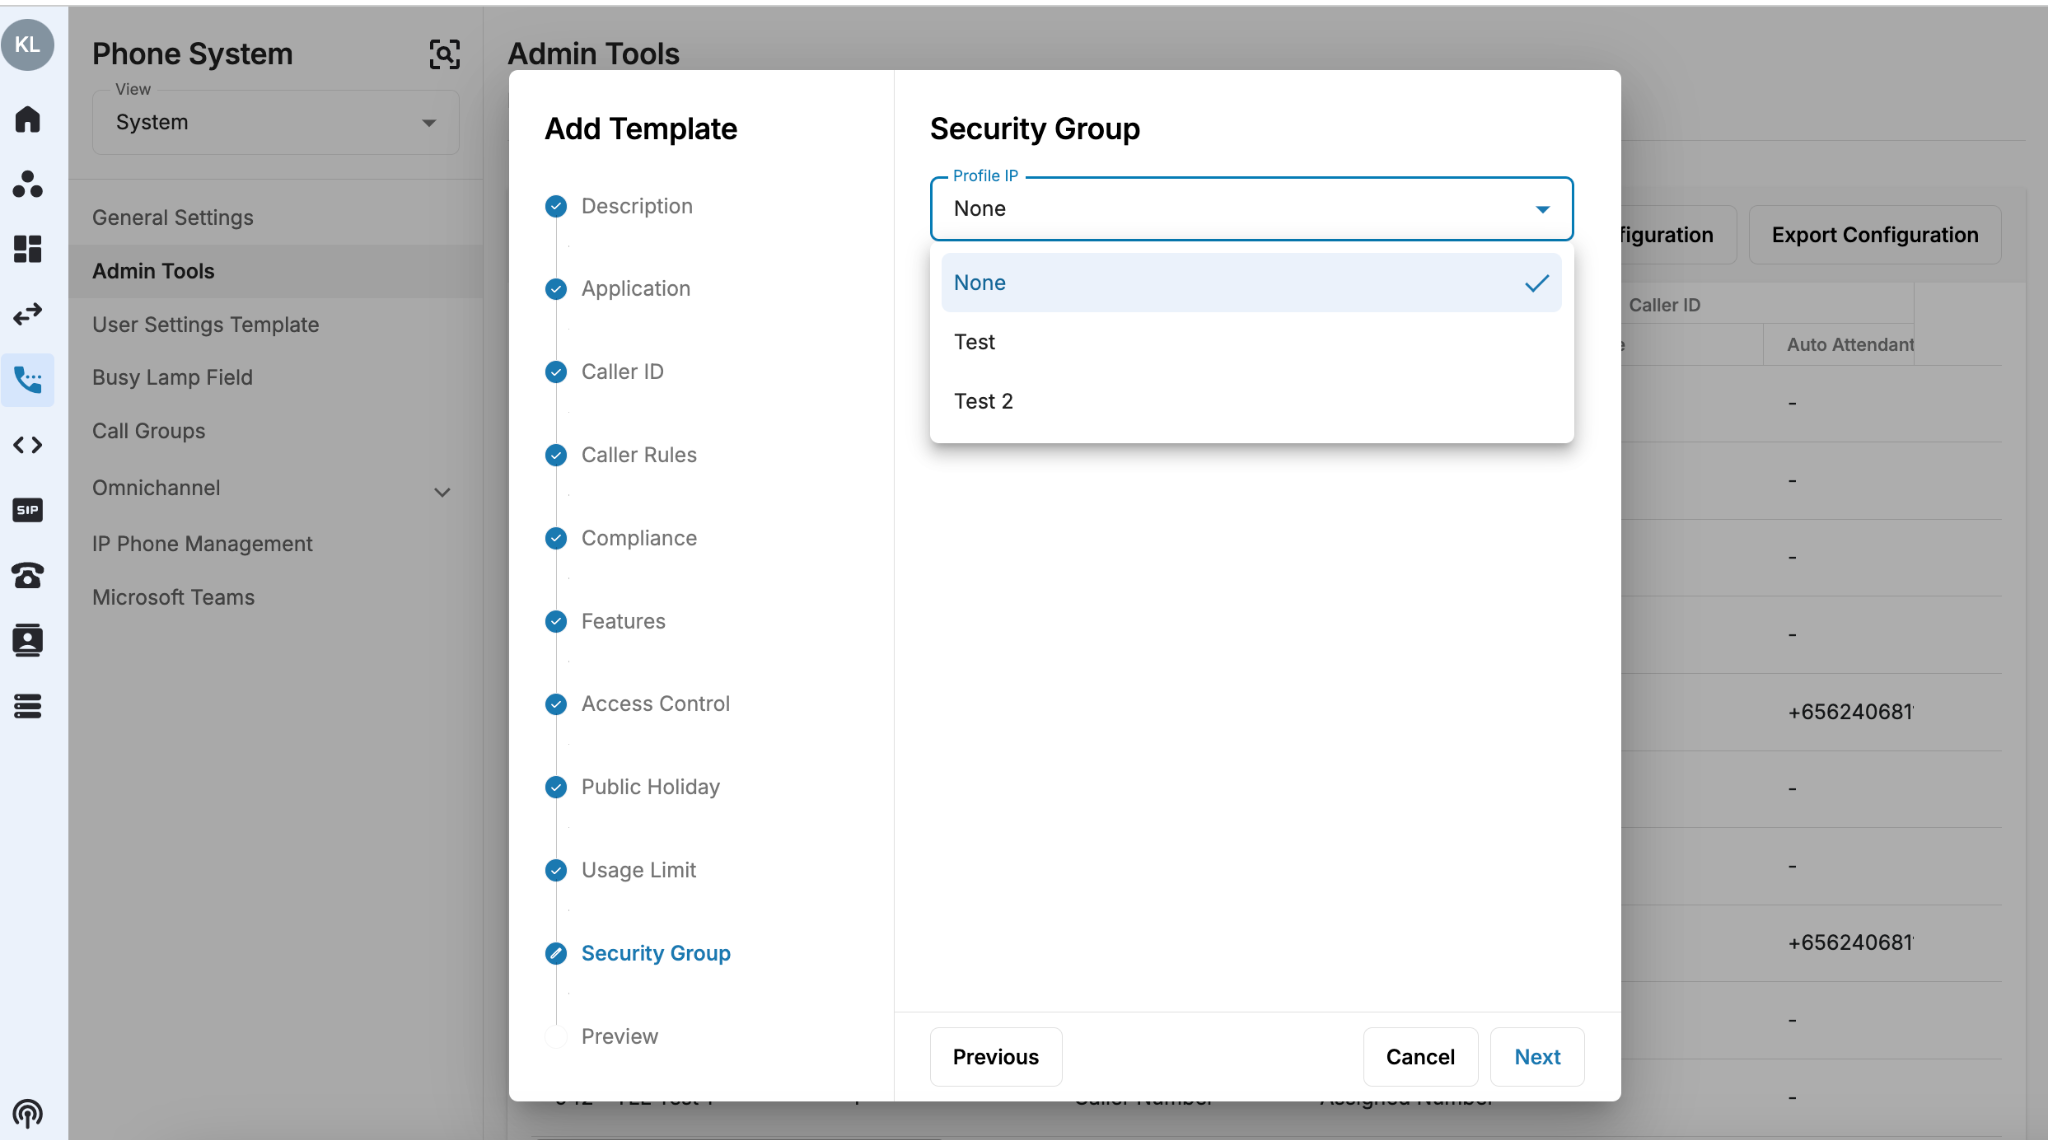
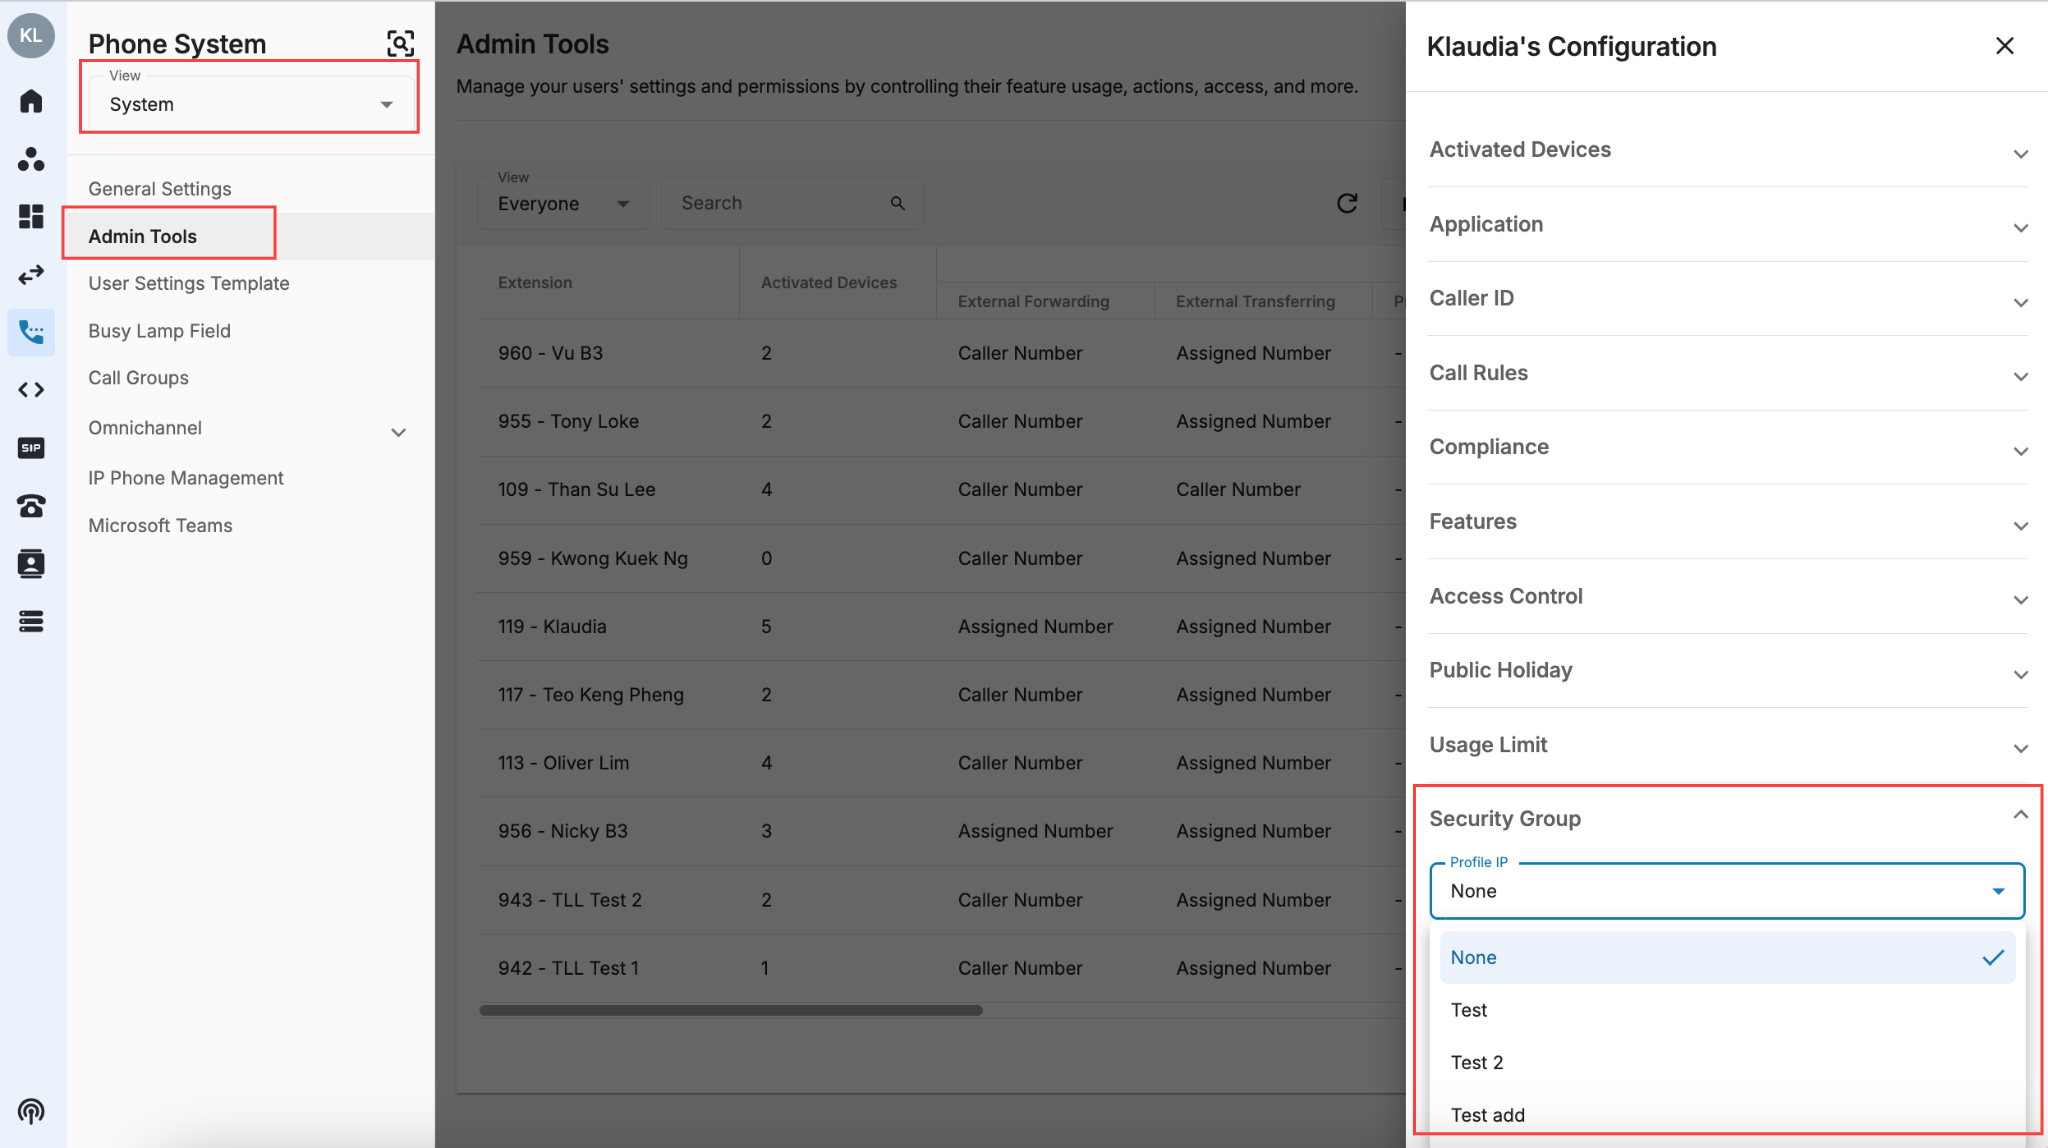
Implementation of Security Groups per Extension
It allows users to select a security group instead of manually entering IP addresses.
Owner and Admin with Phone System permission can configure the implementation of security groups.
- Go to Phone System
- Select view System
- Select Admin Tools
- Search for an extension
- Click on the pencil icon to Edit
- Select Security Group
- Select a Profile IP from the dropdown list
- Default = None = Not check IP whitelist
- Click Save
 * Users can also select Security Group in Bulk Templates.